
So you have decided to give private, encrypted messaging a try. Excellent! This guide will walk you through the whole process, from installation to your first message, in plain language with no technical knowledge required.
The app we will be using is called Conversations. It is free, open source and runs on Android. Your account will be on Chatrix.One, a free Bulgarian XMPP server that respects your privacy.
The whole thing takes just a few minutes.
Part 1 - Installing the App
Step 1 - Open F-Droid
F-Droid is a free app store for Android that contains only open source applications. If you do not have F-Droid yet, download it from f-droid.org. Open the app, which looks like this:
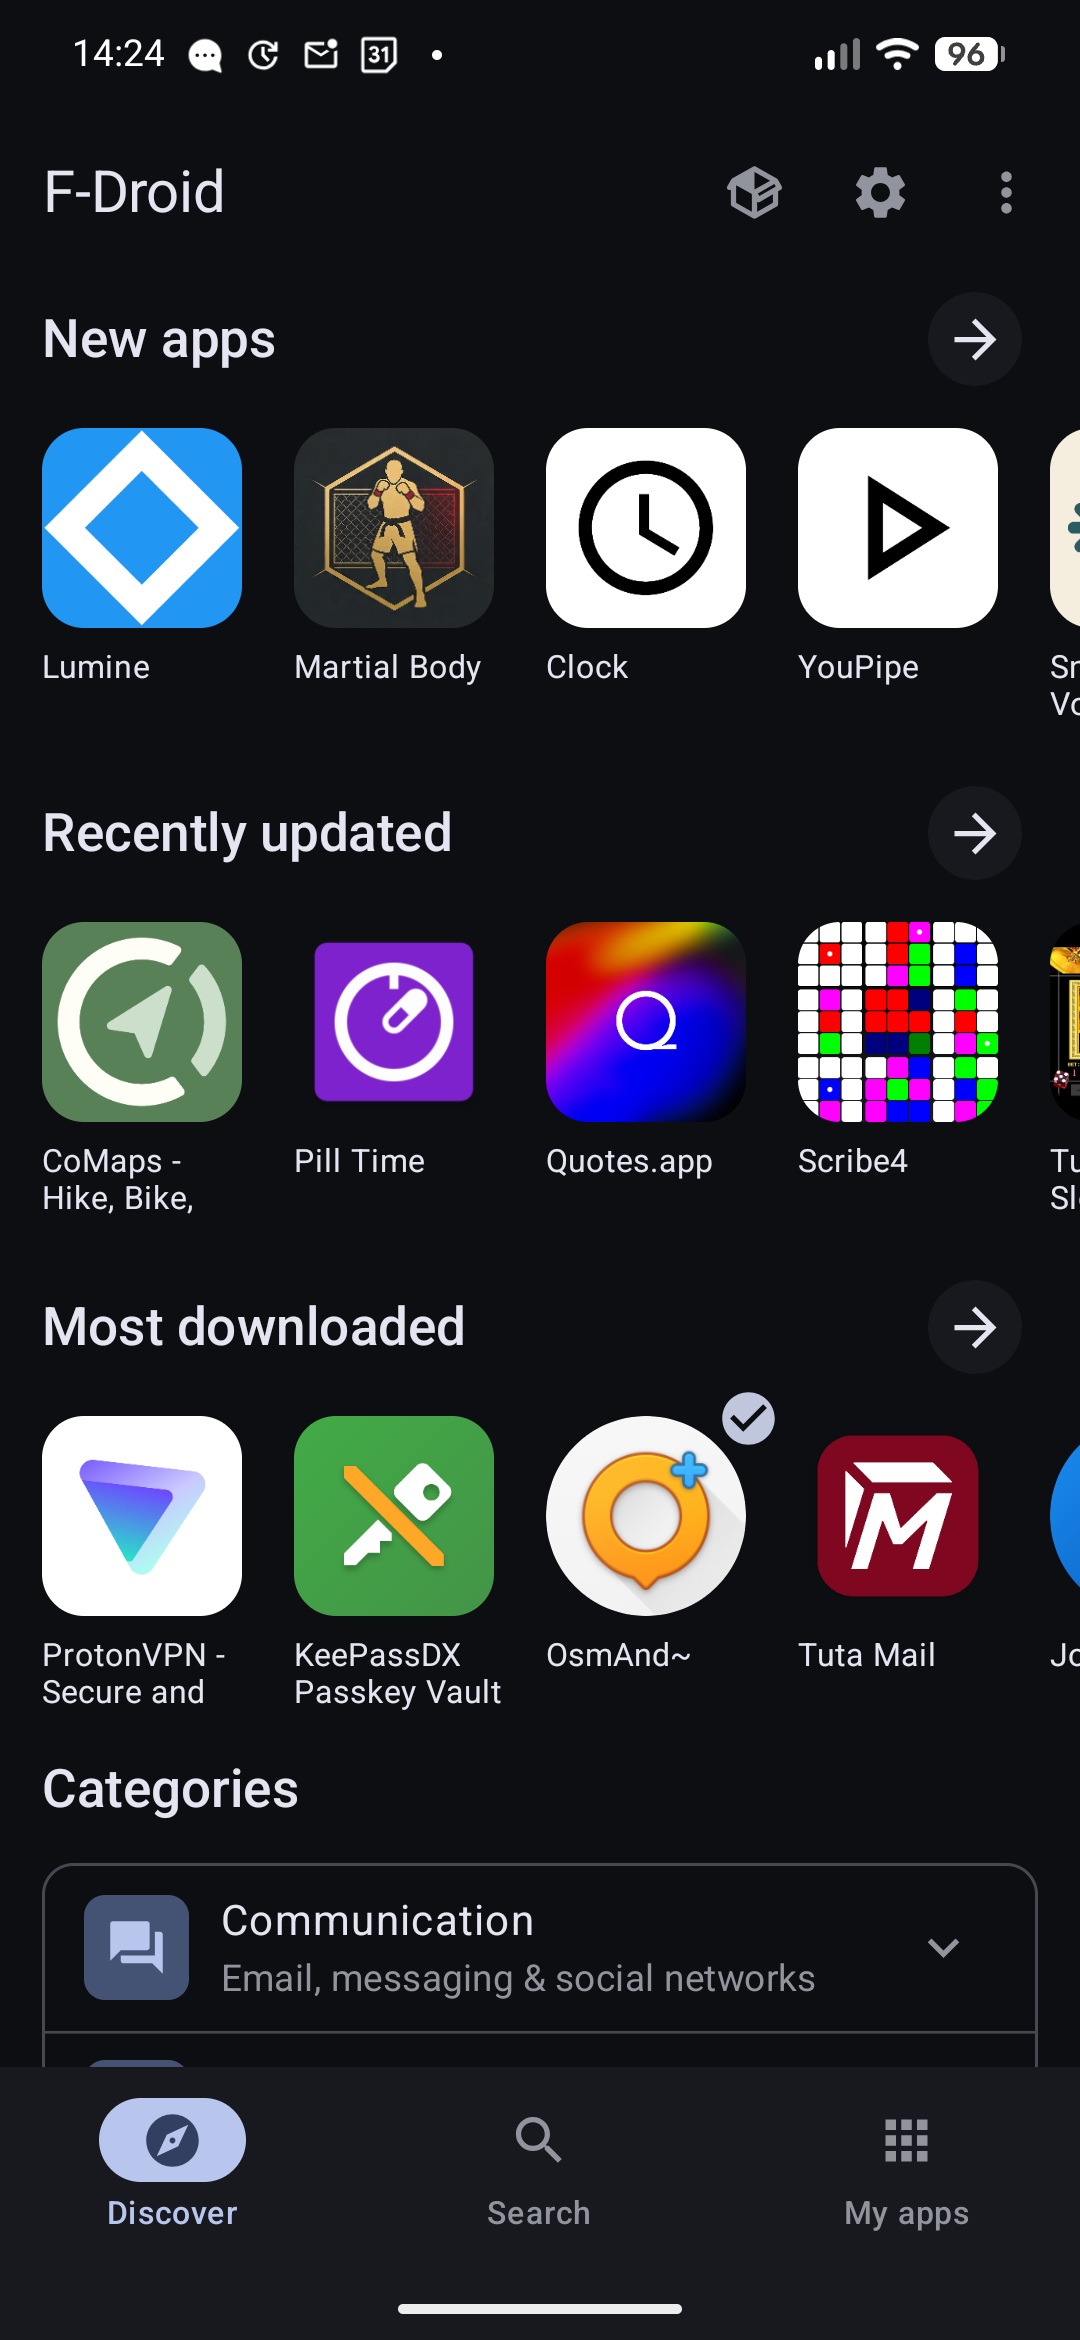
The F-Droid home screen. Tap the Search icon at the bottom.
If you prefer, you can also install the paid version of Conversations directly from the Google Play Store. This is a great way to support the developer. Either way, the steps below are the same.
Step 2 - Find Conversations
Tap the Search tab at the bottom of the screen and type Conversations. The app will appear first in the results. It has a green speech bubble icon and was created by Daniel Gultsch.
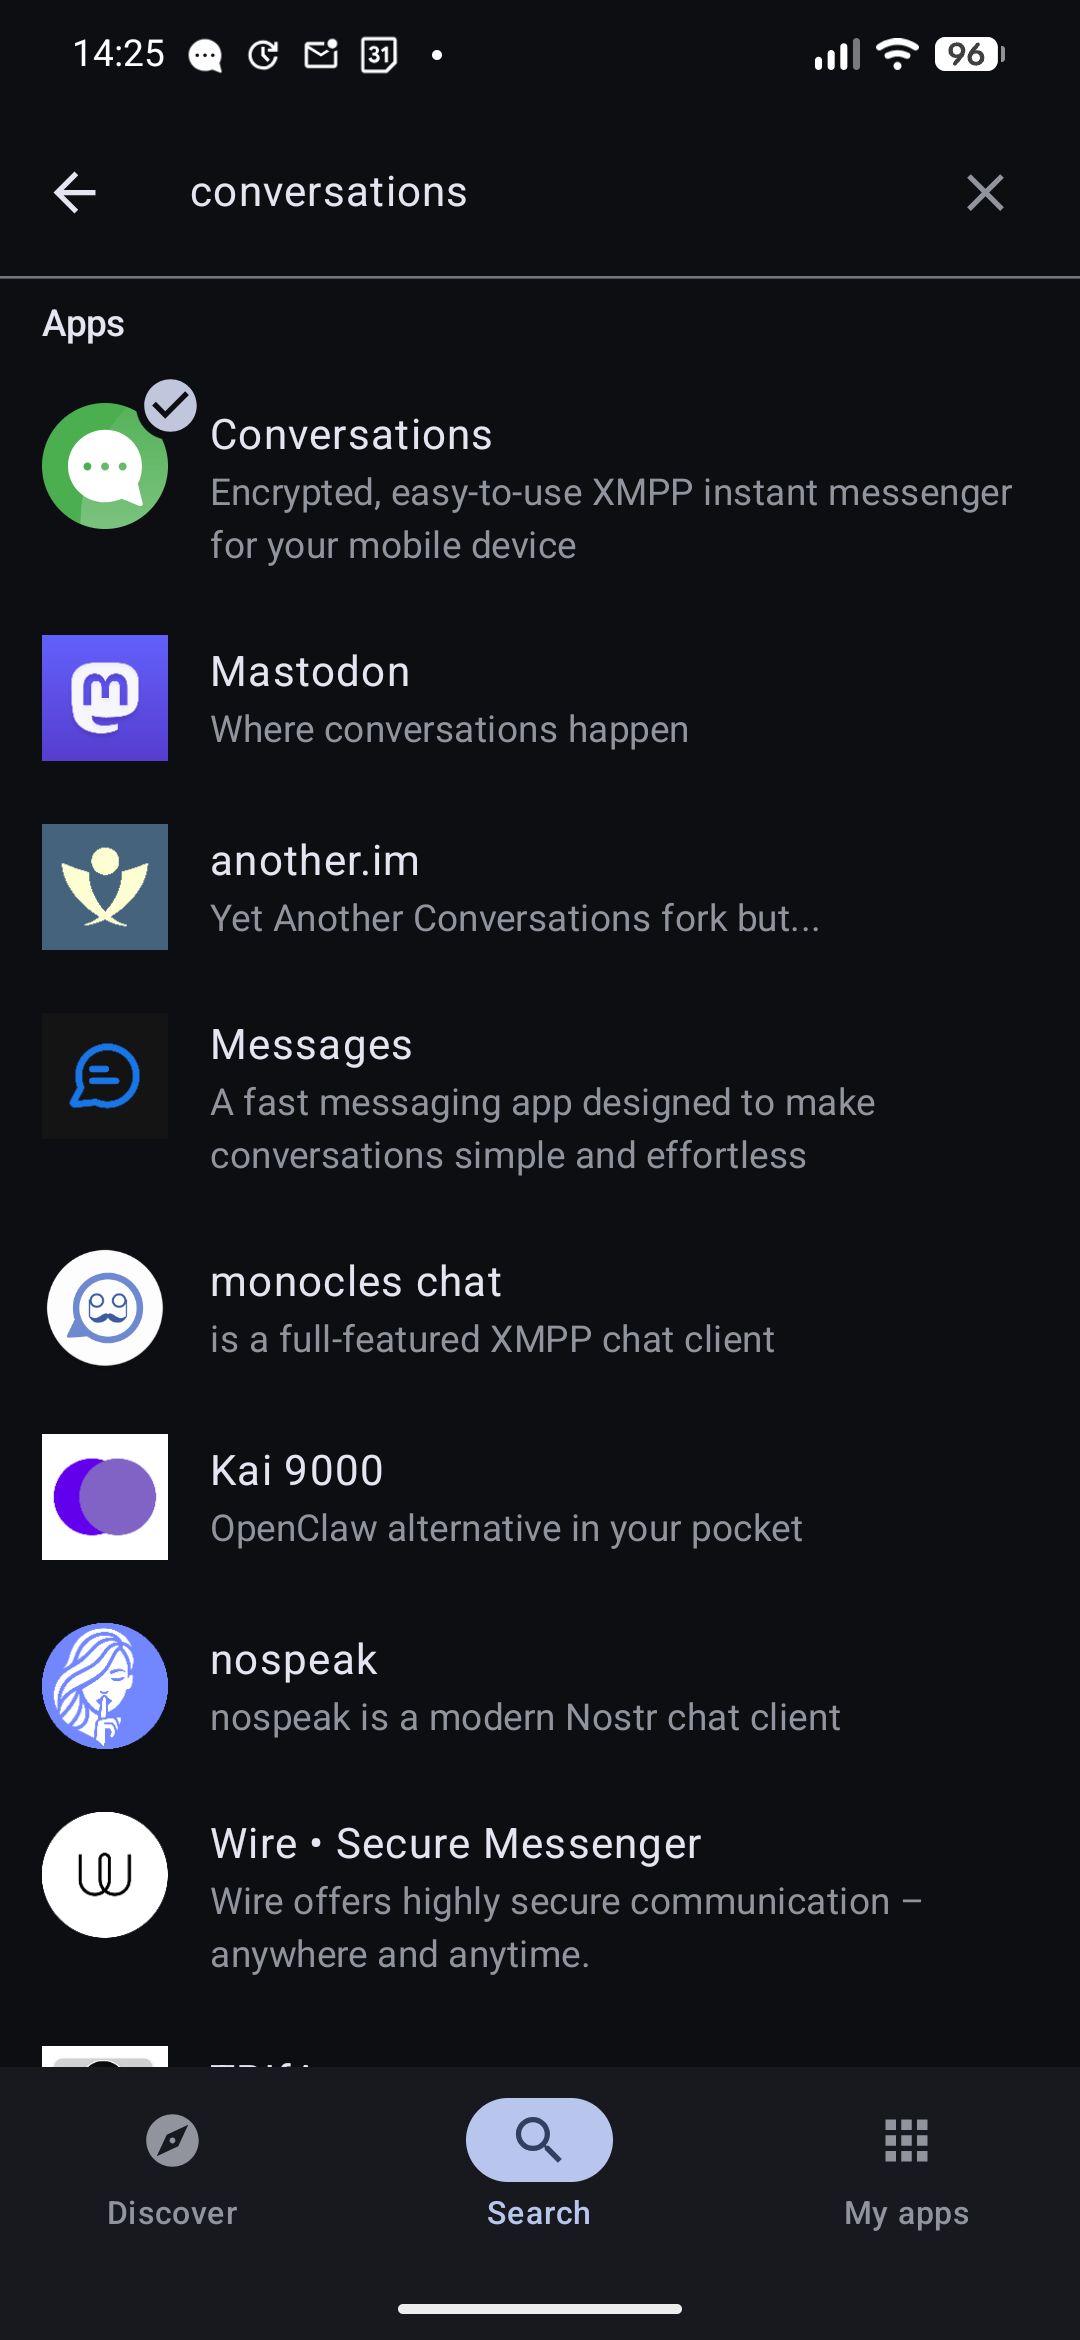
Tap Conversations, the first result with the green icon and blue checkmark.
Step 3 - Install and Open the App
On the app page tap Install. Once the download finishes, the button changes to Open. Tap it to launch Conversations for the first time.
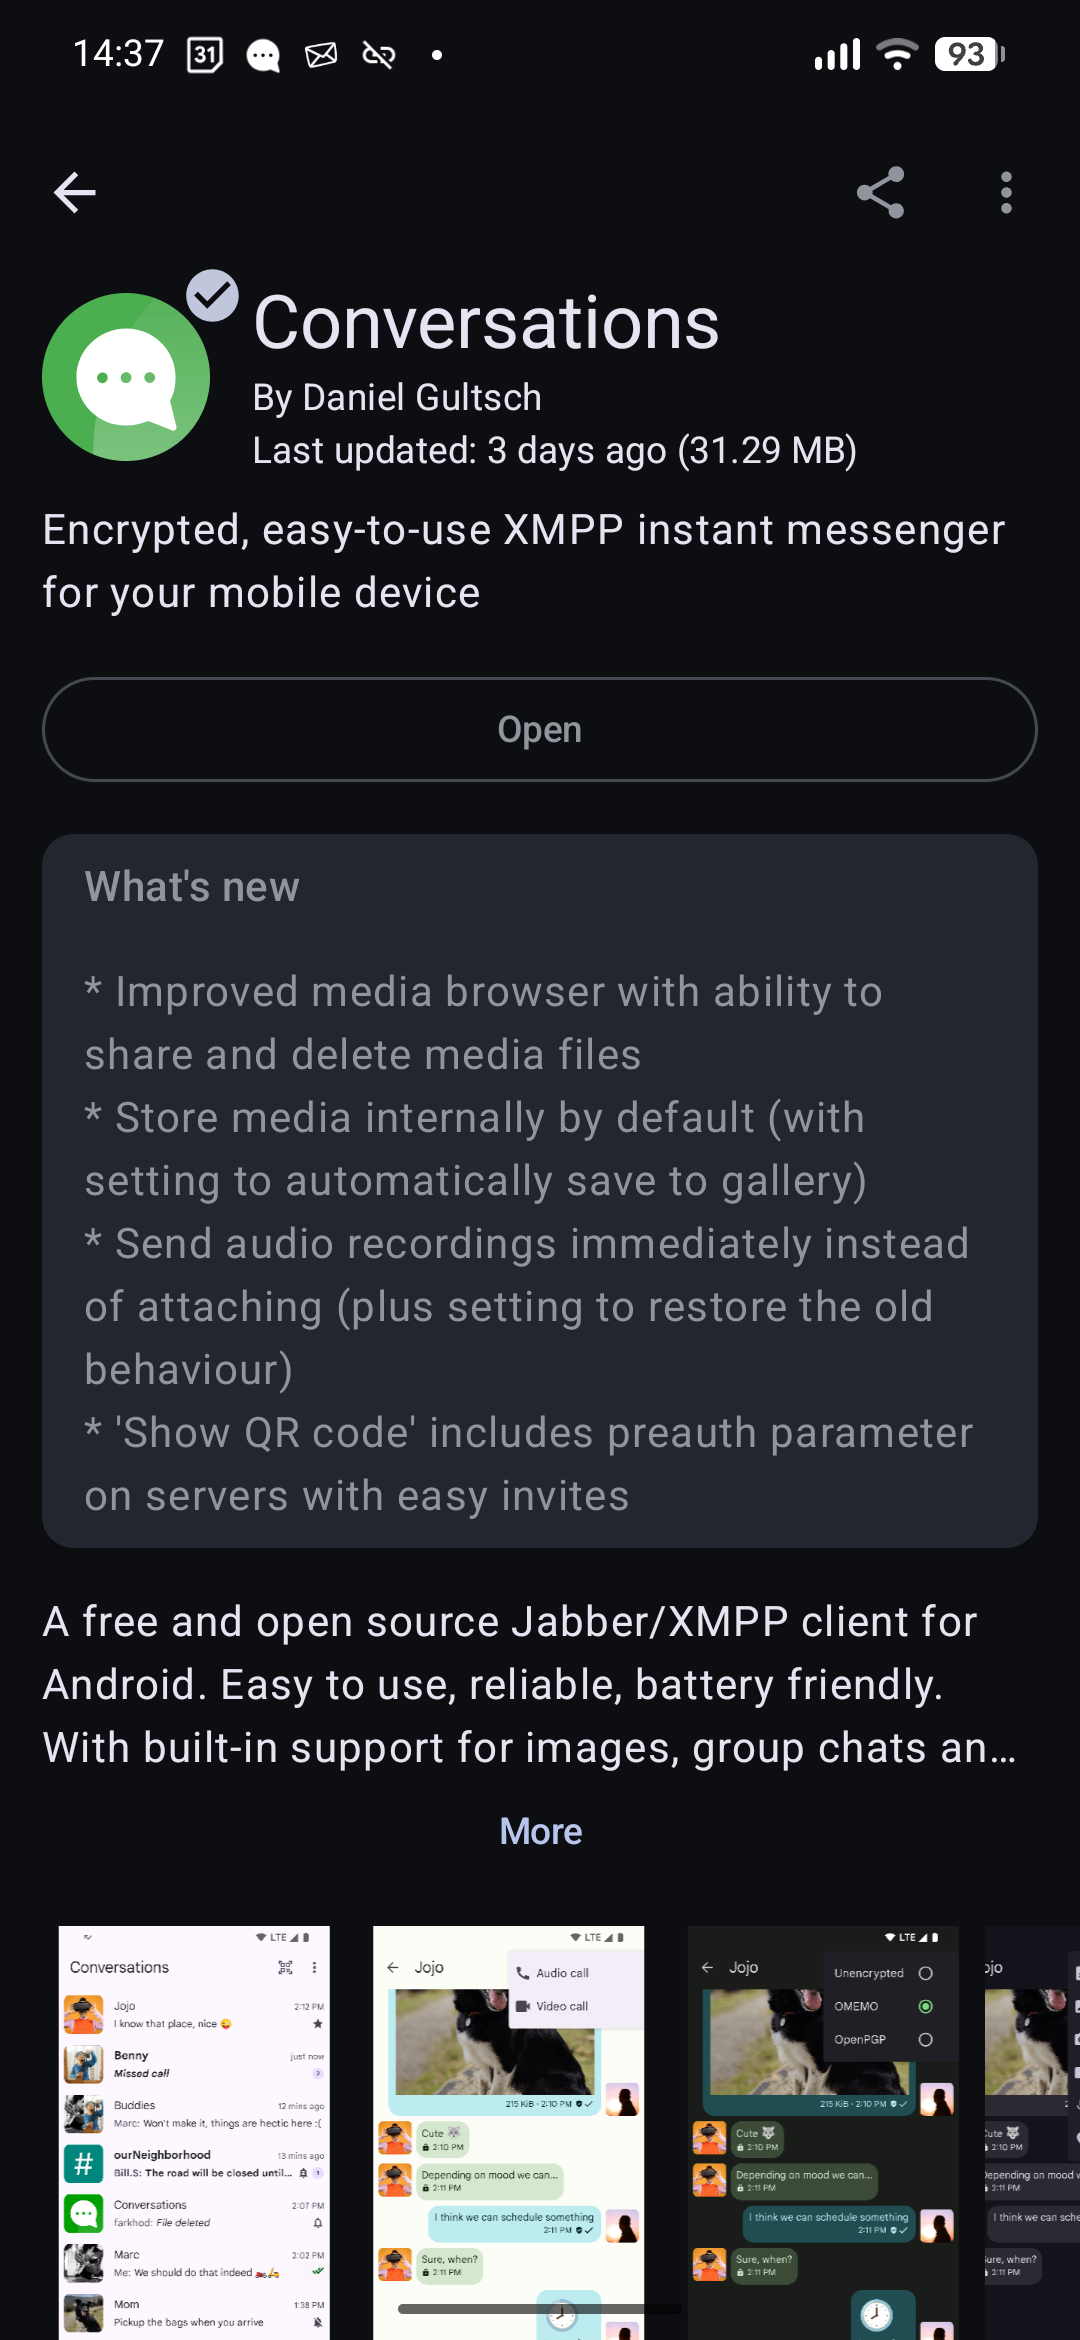
Tap Open once the installation is complete.
Part 2 - Setting Up Your Account
Step 4 - The Welcome Screen
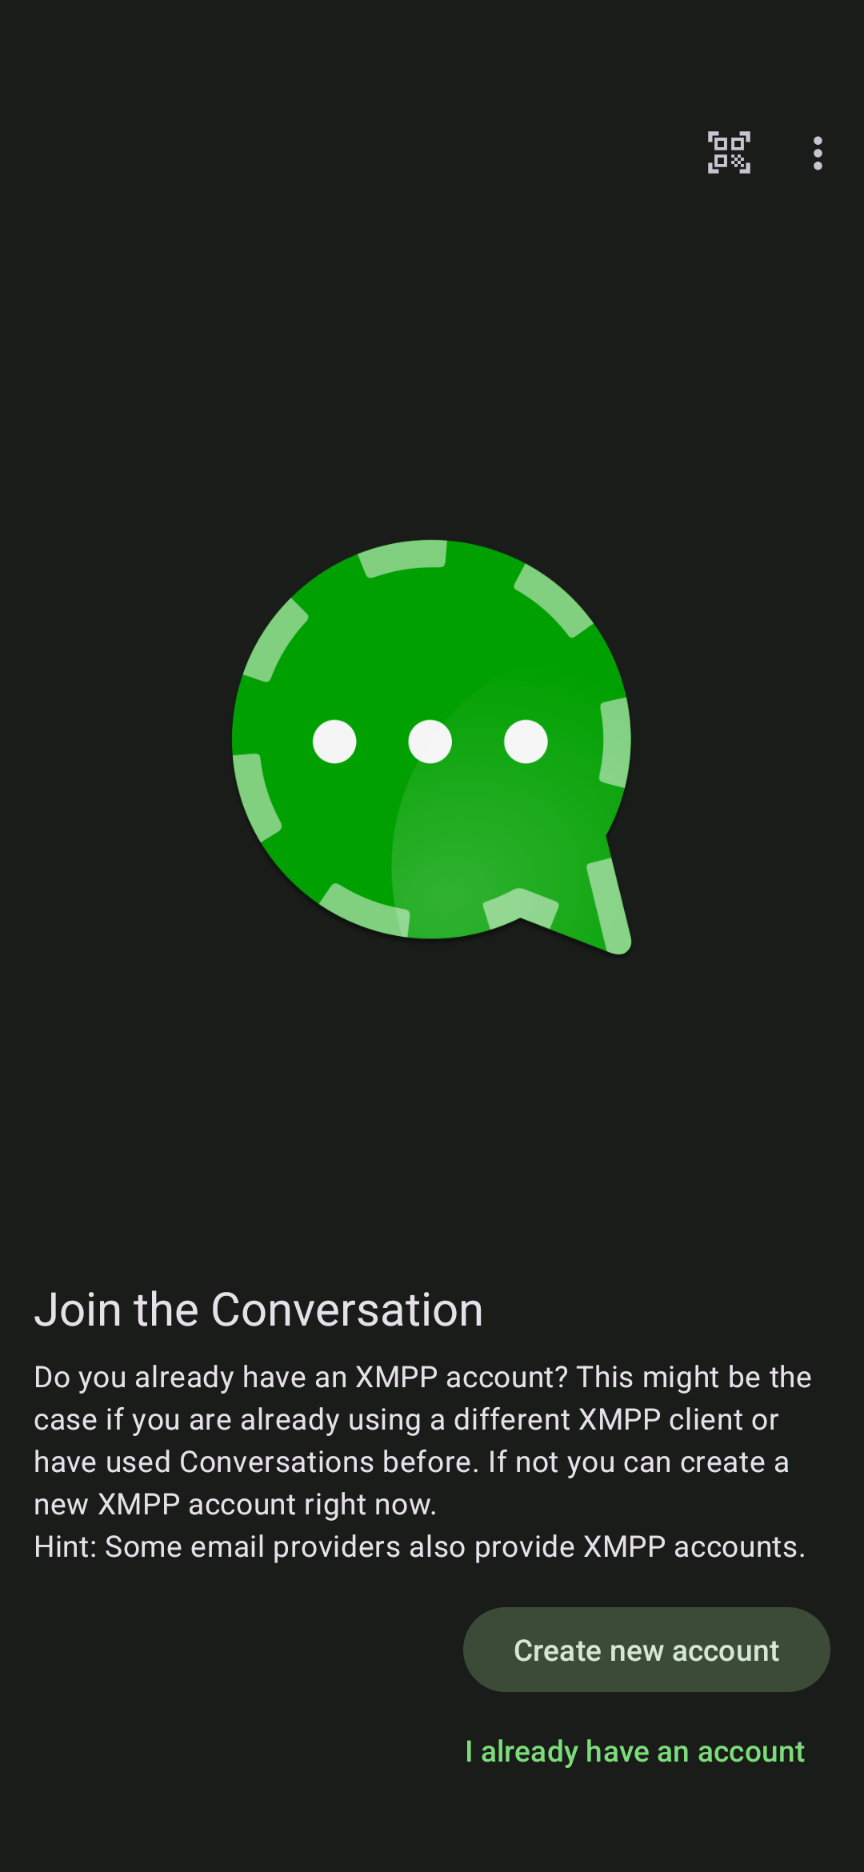
The first time you open Conversations you will see a welcome screen with a green logo. The app asks whether you want to create a new account or sign in with an existing one.
Important: The app may suggest using conversations.im as your provider. To use Chatrix.One instead, tap “Use my own provider”.
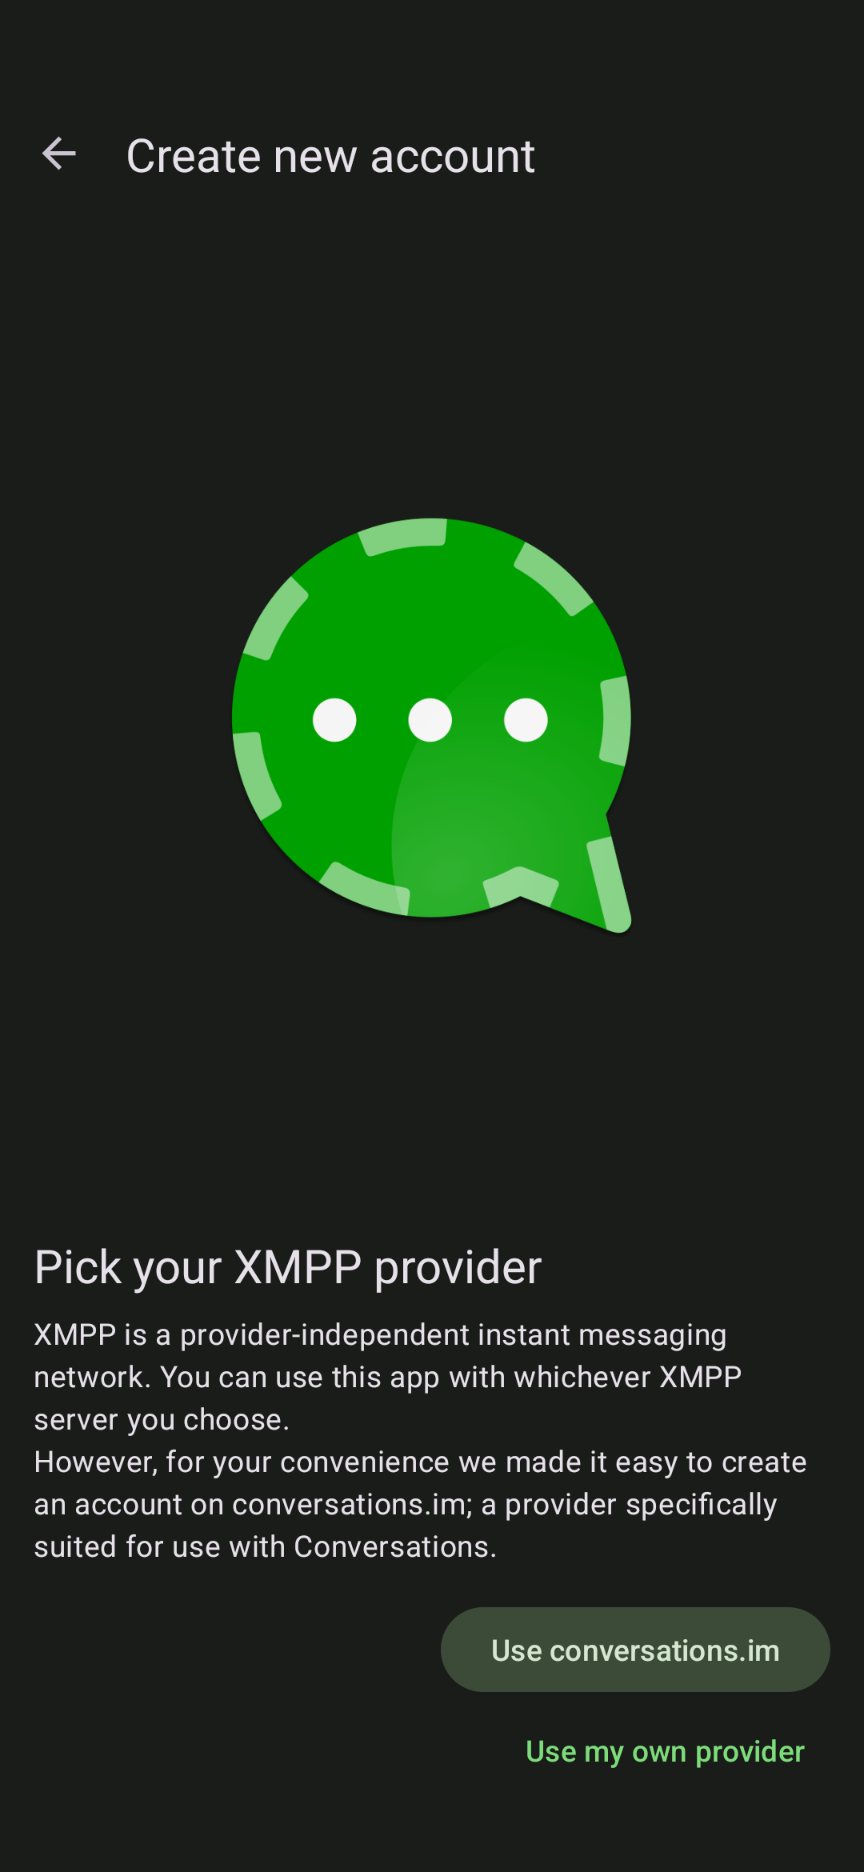
The welcome screen. Choose whichever option applies to you.
Step 5 - Choose Your Path
You have two options:
- Create new account - if you are new to Chatrix.One and do not have an address yet
- I already have an account - if you have already registered on chatrix.one and just need to sign in
Tap Create new account if you are new, or I already have an account if you registered before.
Step 6 - Sign In With an Existing Account
If you already have an account, this is your screen. Enter your full address, for example
peter@chatrix.one, and your password. Then tap Next.If you are creating a new account, skip ahead to Step 7.
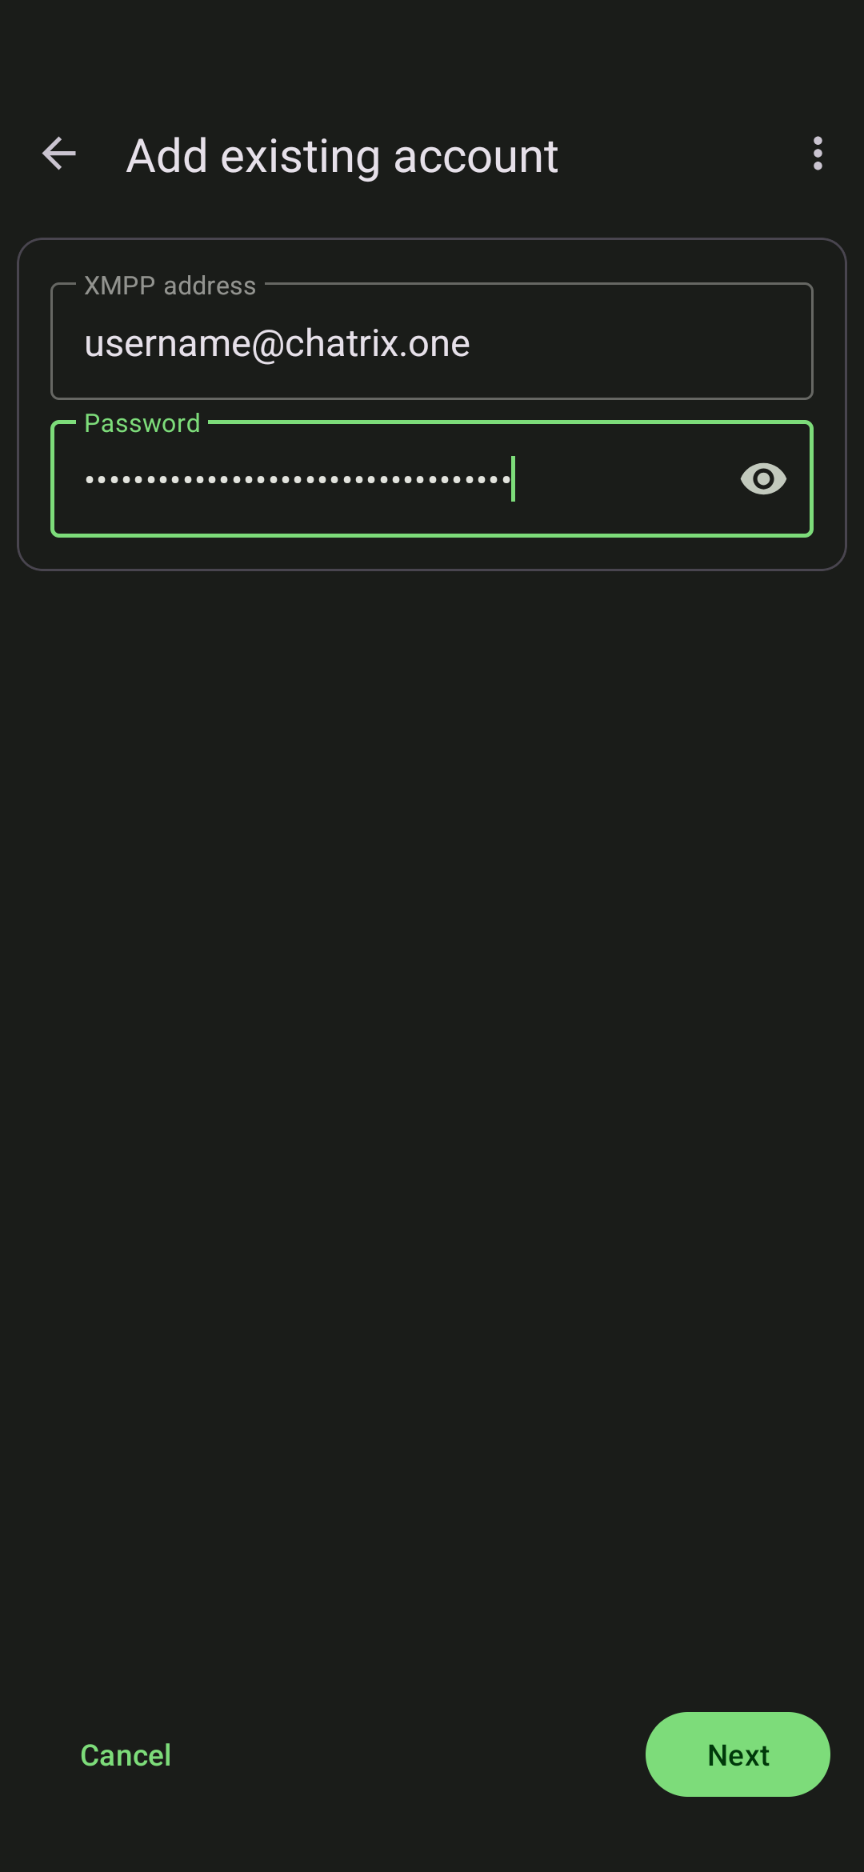
Enter your address like peter@chatrix.one and your password, then tap Next.
Part 3 - Creating a New Account
Step 7 - Choose a Username
If you chose Create new account, you will be asked to enter your full XMPP address. You need to enter the whole address including the server, for example maria@chatrix.one. Do not enter just the username without @chatrix.one.
Pick something you will be happy to share with others, as that is how people will find you. Then tap Next.
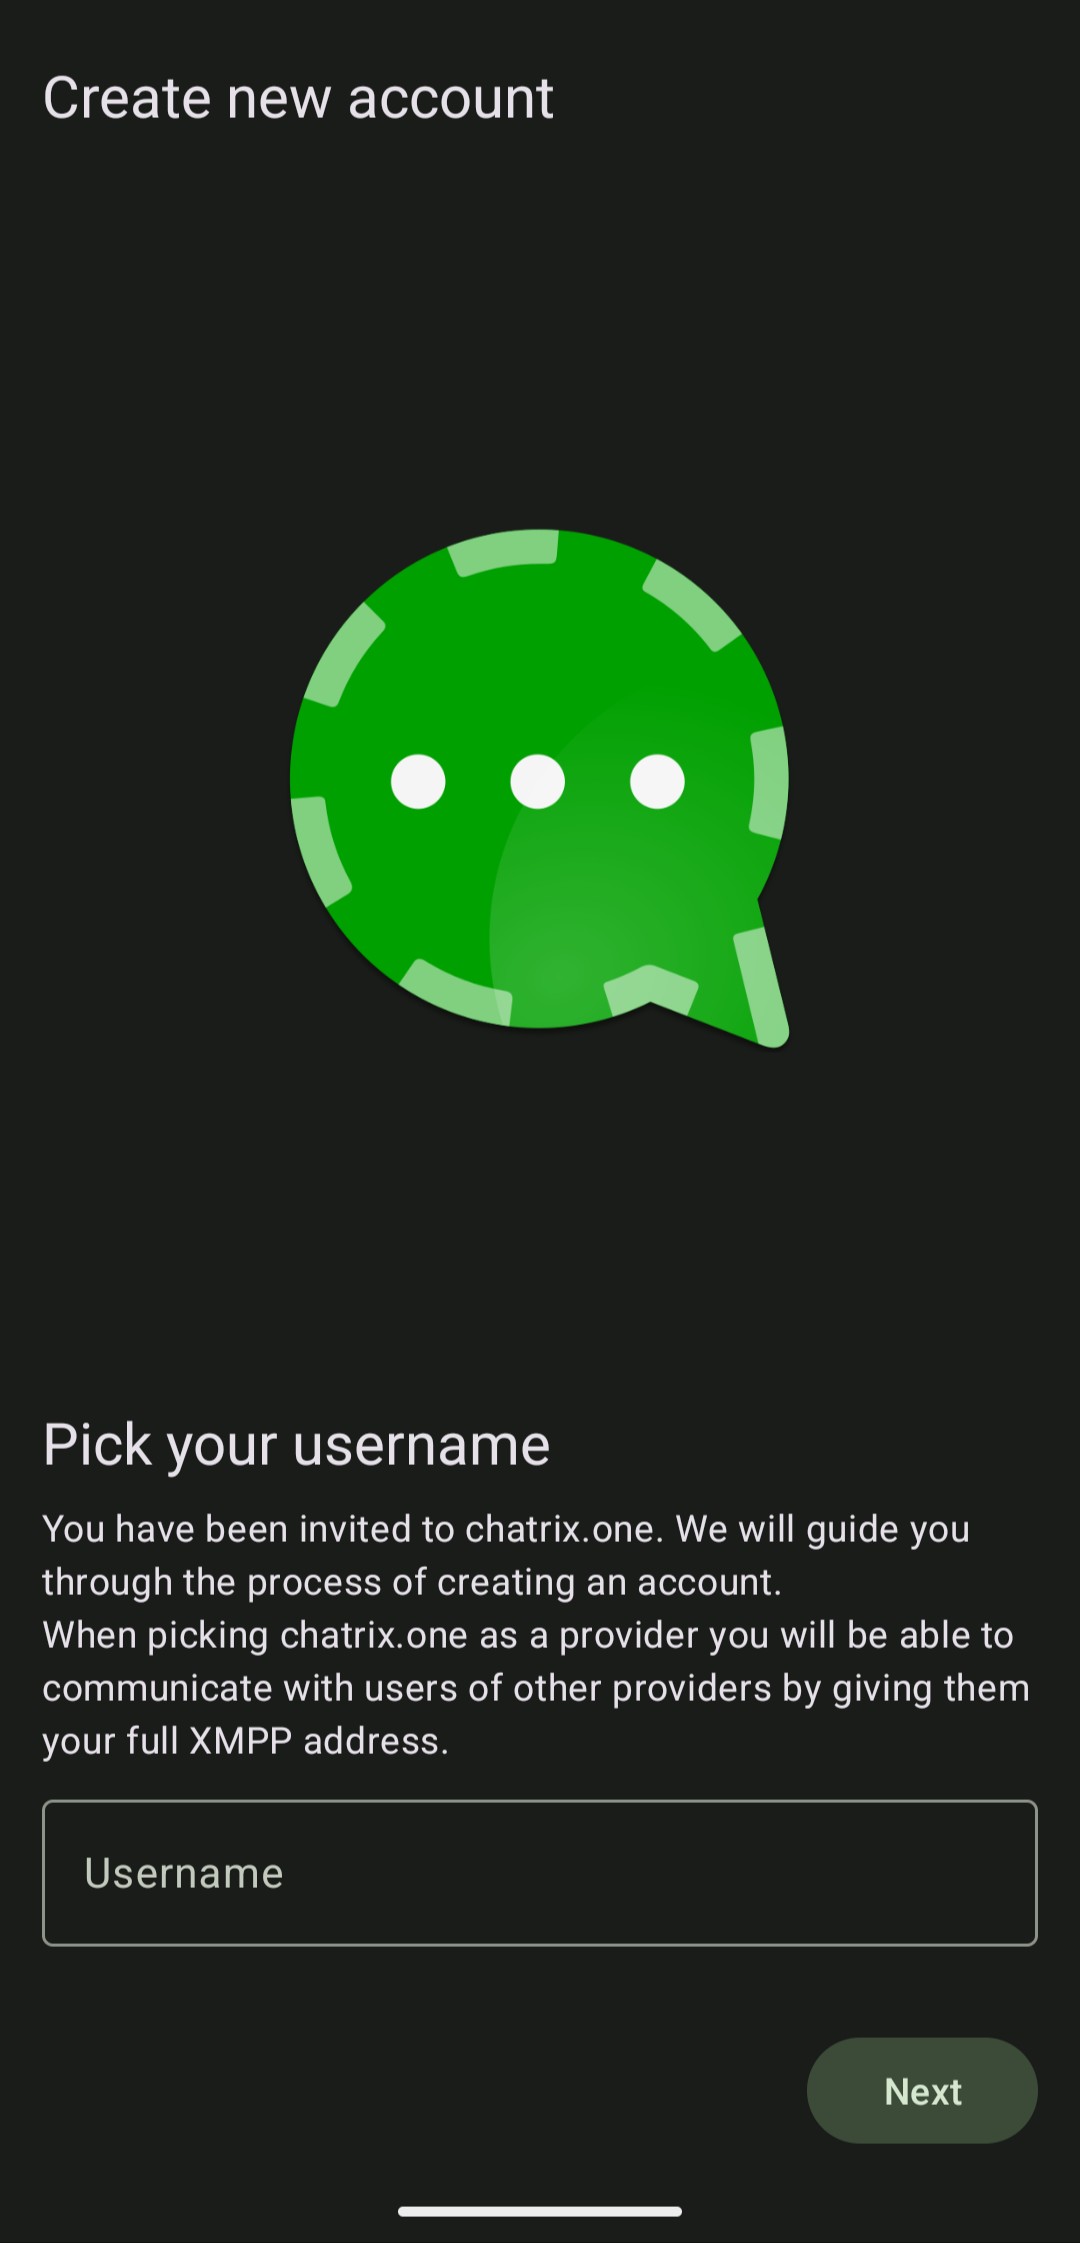
Enter the username you have chosen and tap Next.
Step 8 - Open the Registration Website
After tapping Next, the app will show a message saying “The server requires registration on a website” along with a red warning icon. This is completely normal. Chatrix.One asks you to finish registration in your browser as a security measure.
Tap the Open website button in the bottom right corner.
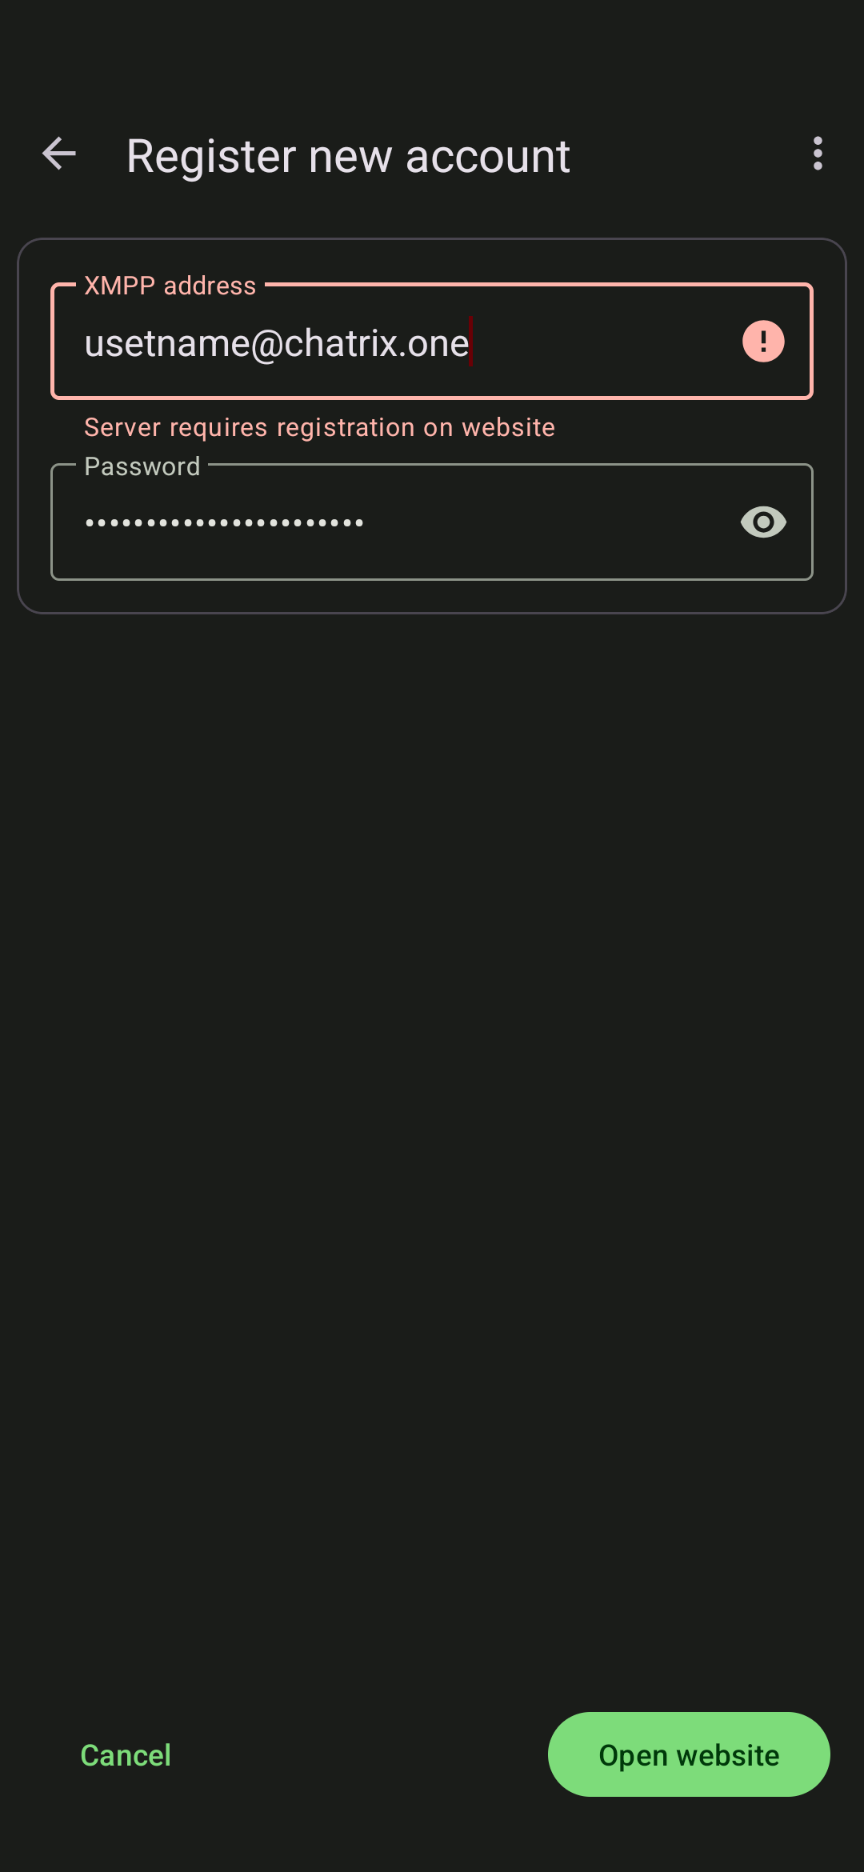
Do not worry about the red warning. Tap Open website to continue in your browser.
Step 9 - Solve the CAPTCHA
Your browser will open the Chatrix.One registration page. You will see a simple security check. Tick the box that says “I am human”. This simply confirms you are a real person and not a bot. Complete the challenge that appears.
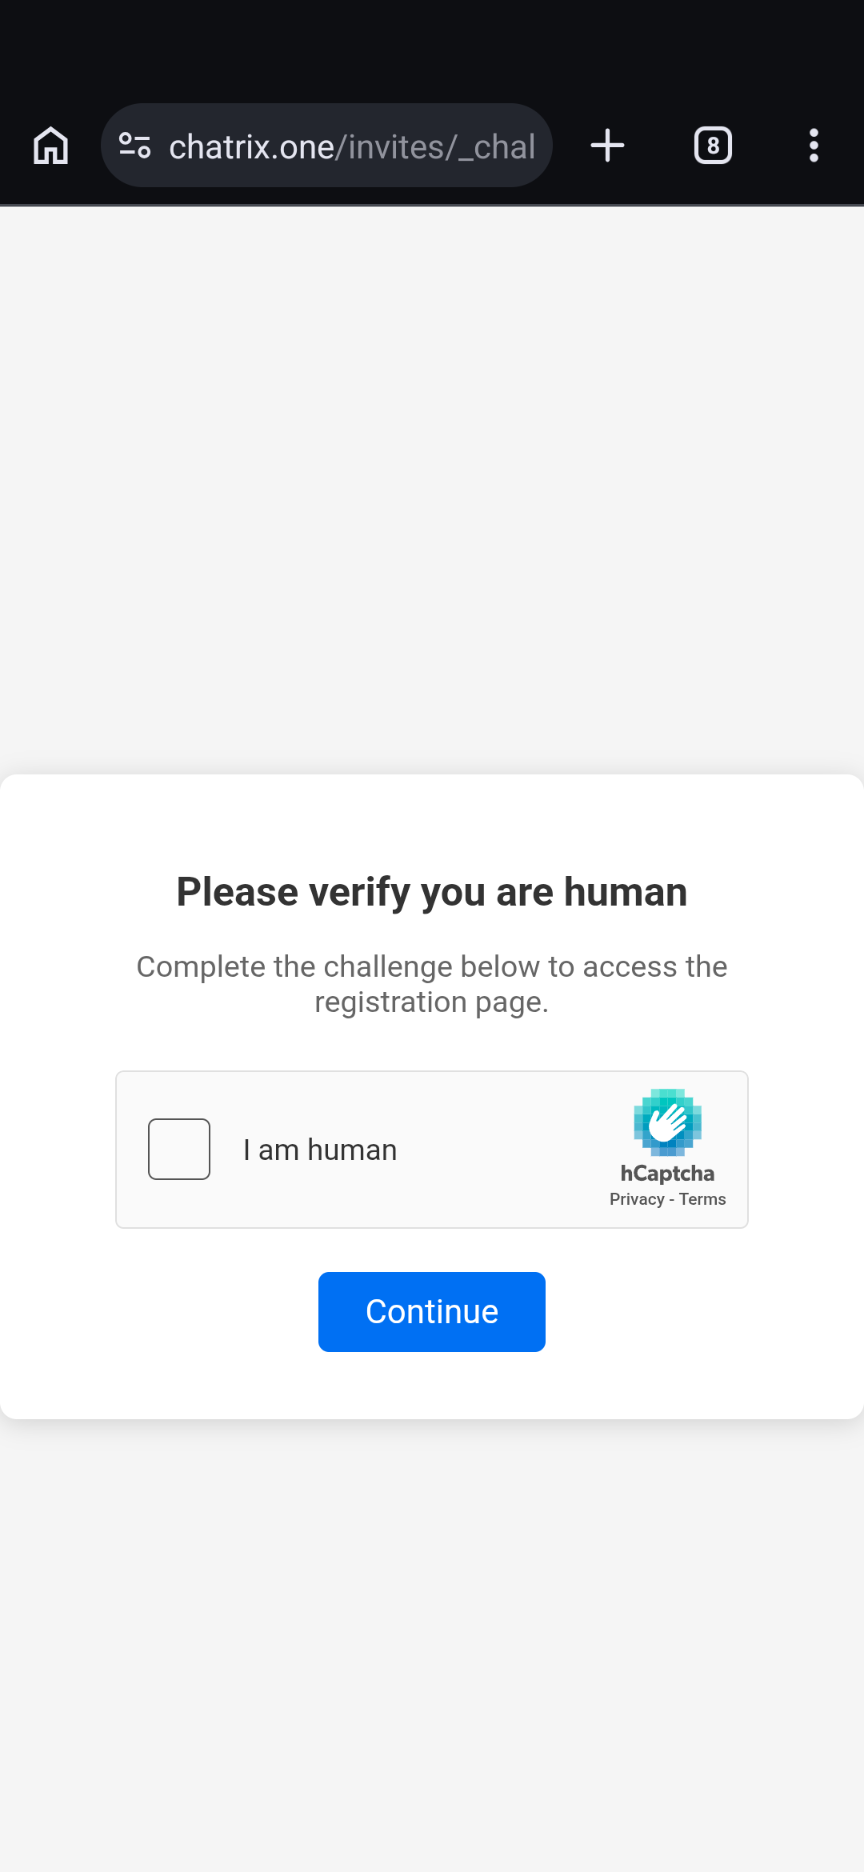
Tick "I am human" to pass the security check.
Step 10 - Tap Continue
Once the tick turns green, tap the Continue button to move on to the registration form.

The tick is now green. Tap Continue.
Step 11 - Fill In the Registration Form
The Chatrix.One registration page opens in your browser. Fill in your username and password.
- Check that the username looks right, for example: peter@chatrix.one
- Enter a strong password that you do not use anywhere else
- Tap Submit
Done! Your account has been created. Go back to the Conversations app.
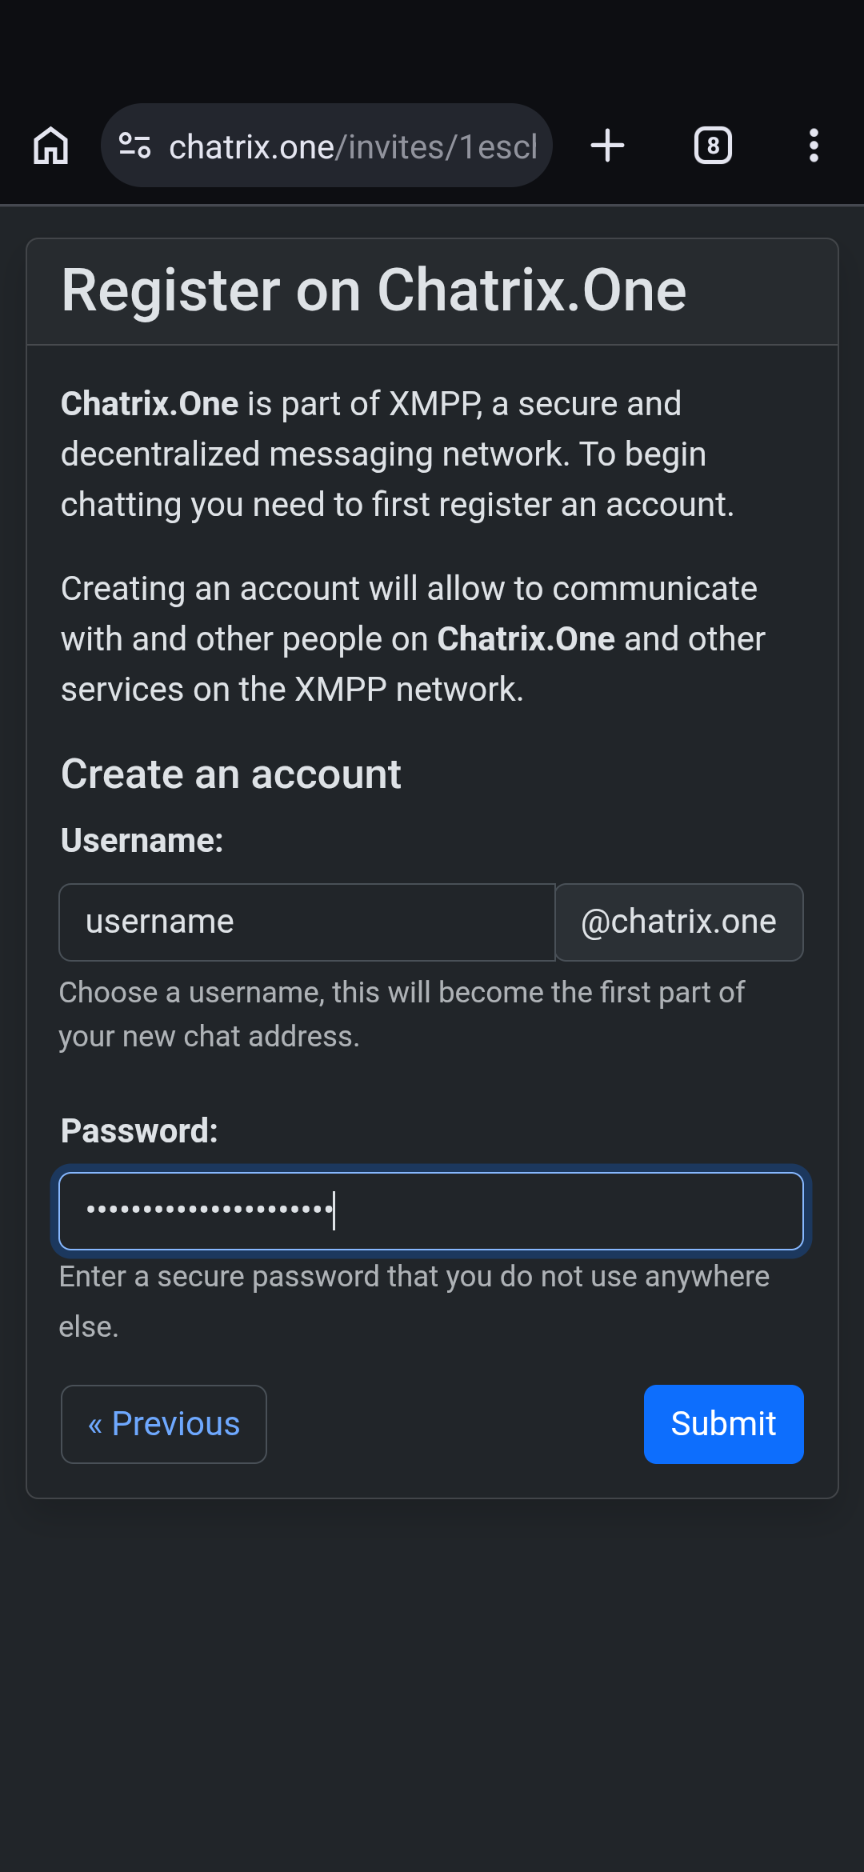
Confirm your username, enter a strong password and tap Submit.
After Step 11 - Back in the App
Now that your account has been created in the browser, go back to the Conversations app. You will see the same screen from Step 4. This time follow Steps 4, 5 and 6, but choose “I already have an account” and sign in with the username and password you just created.
After a successful login the app connects to Chatrix.One and you land on the main screen.
Part 4 - Your First Chat
Step 12 - The Main Screen
You are now logged in, but the conversation list is empty. That is perfectly normal for a new account. To start a chat, tap the green “Start chat” button in the bottom right corner.

Tap the green Start chat button in the bottom right corner.
Step 13 - Tap the + Icon
The New Chat screen opens on the contacts tab. Since you are a new user the list is empty. Tap the green + button in the bottom right corner to add someone.
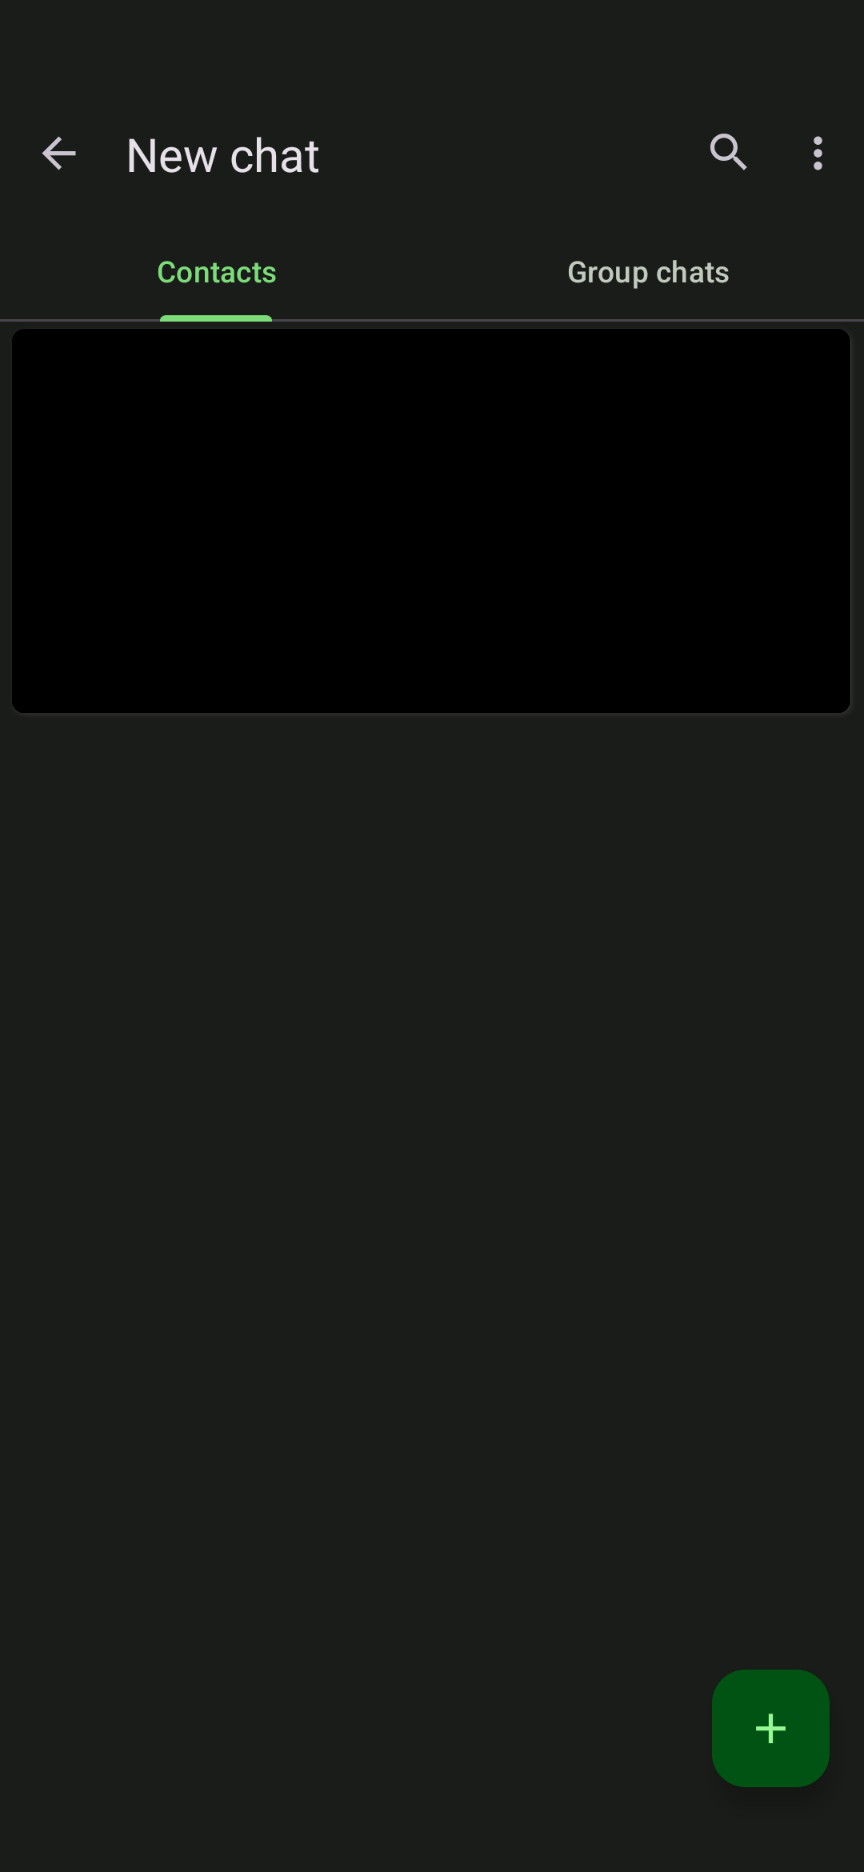
Tap the green + button to see your options.
Step 14 - Choose What You Want to Do
A menu appears with several options:
- Add contact - start a private chat with one person
- Create private group chat - start a group conversation
- Join public channel - join an open channel
- Create public channel - create your own channel
- Discover channels - browse available public channels
To add a contact for a private chat, tap Add contact.
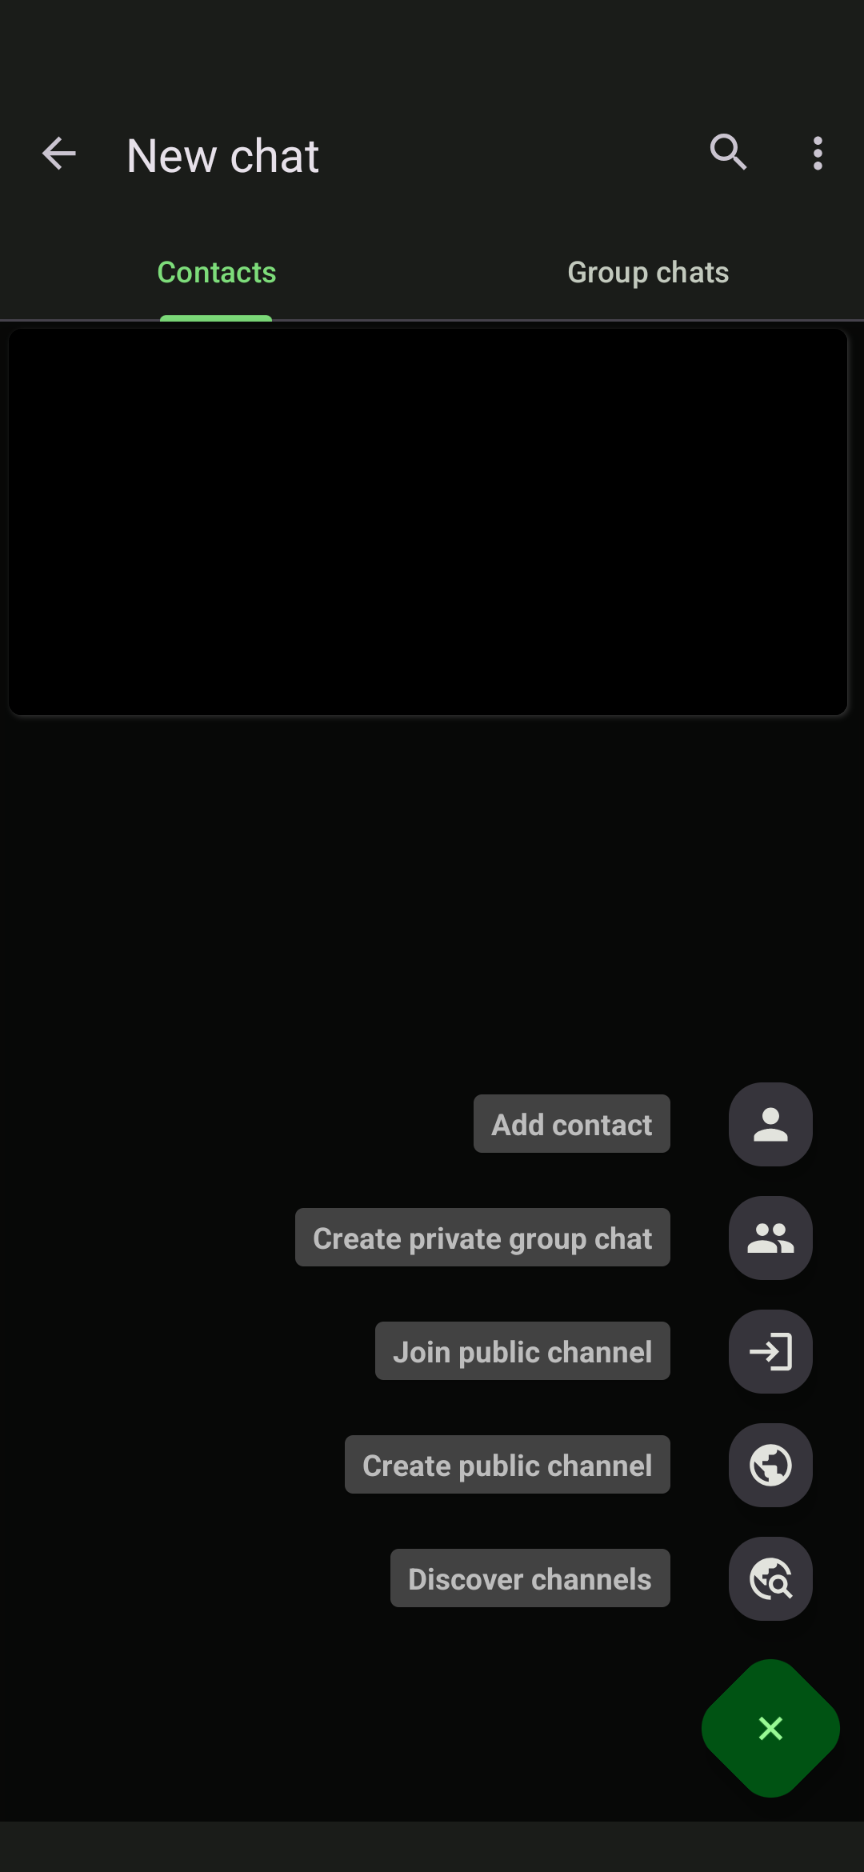
Tap Add contact to start a private chat.
Step 15 - Enter the Contact’s XMPP Address
A dialog box appears where you need to enter the full XMPP address of your contact, for example ivan@chatrix.one or maria@server.org. If you have more than one account, you can choose which one to send from.
Tap Add when you are ready.
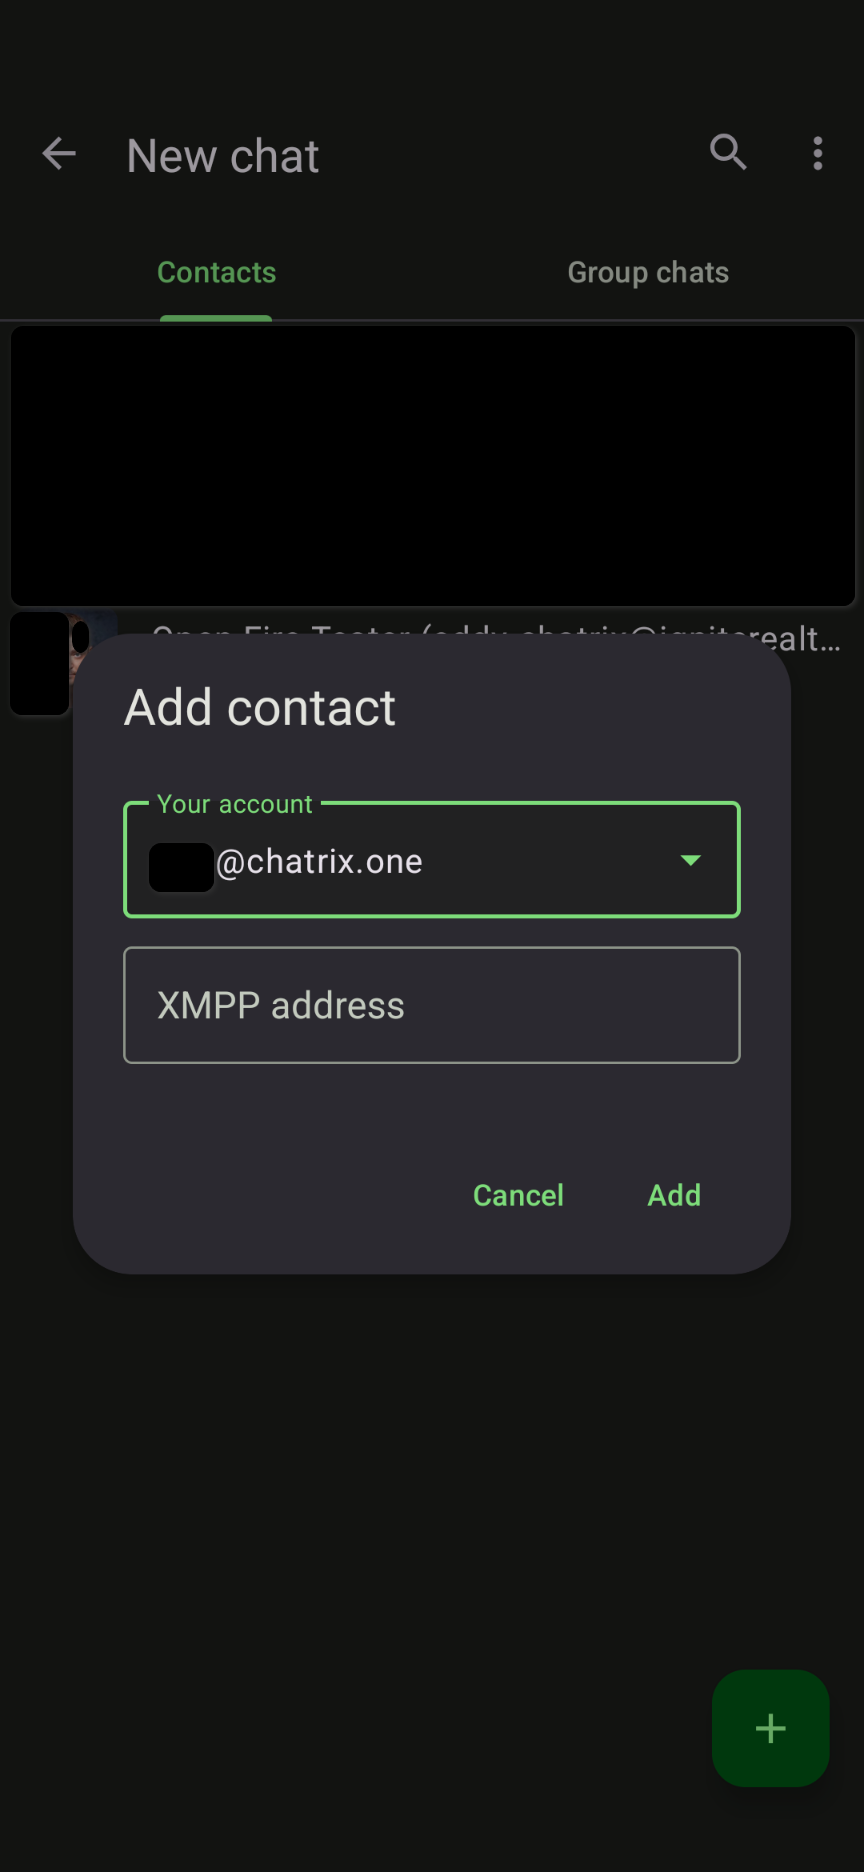
Enter the full XMPP address of your contact and tap Add.
A contact request has been sent and as soon as it is accepted you can start writing. All messages are encrypted end-to-end automatically.
You are all set. Welcome to private and open communication.